Chip King Paint Touch Up System
* 85 Pre-Mixed Ready To Use Automotive Paints
* Just Wipe-On and Wipe-Off For Permanent Repairs
* Blob Free With Professional Results...Guaranteed
GET TRAINED. GET CERTIFIED.
Paint Chips - PERFECTED
Chip King Pre-Mixed Paint Touch Up System Includes:
- 1/2 Day of Training
- Easy To Use Pre-Mixed Paint Package
- Ding King Chip Repair Kit Includes 85 Colors
- Complete Accessory & Chemical Package
- Ability to Custom Blend Colors
- Certificate of Completion
- Business Development
Learn To Repair:
- Paint Chips
- Small Scratches
- Chipped Door Edges
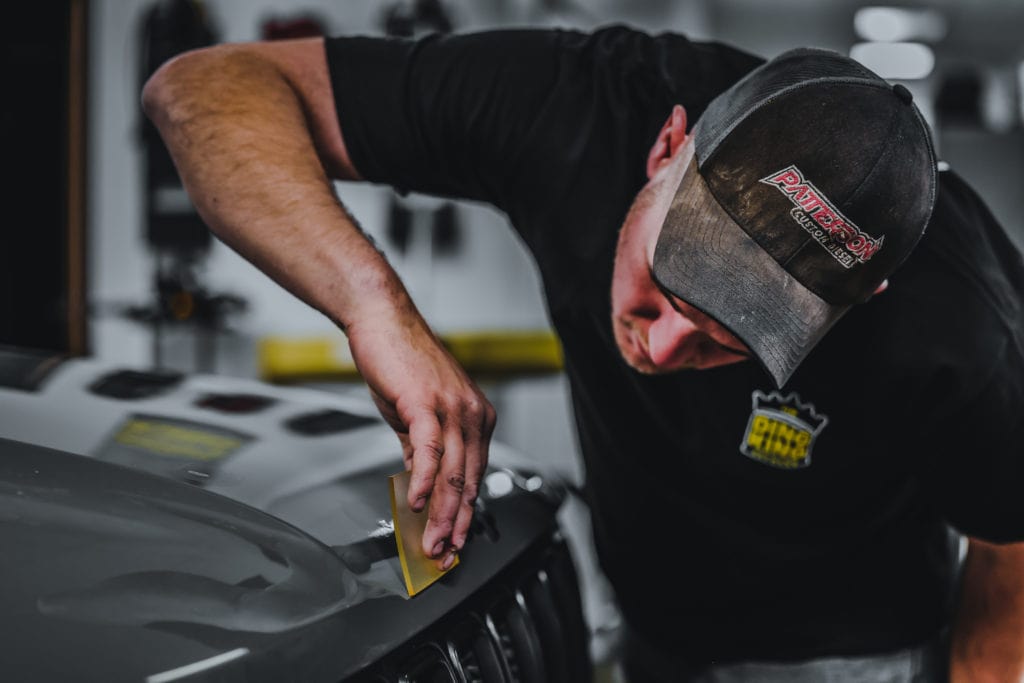
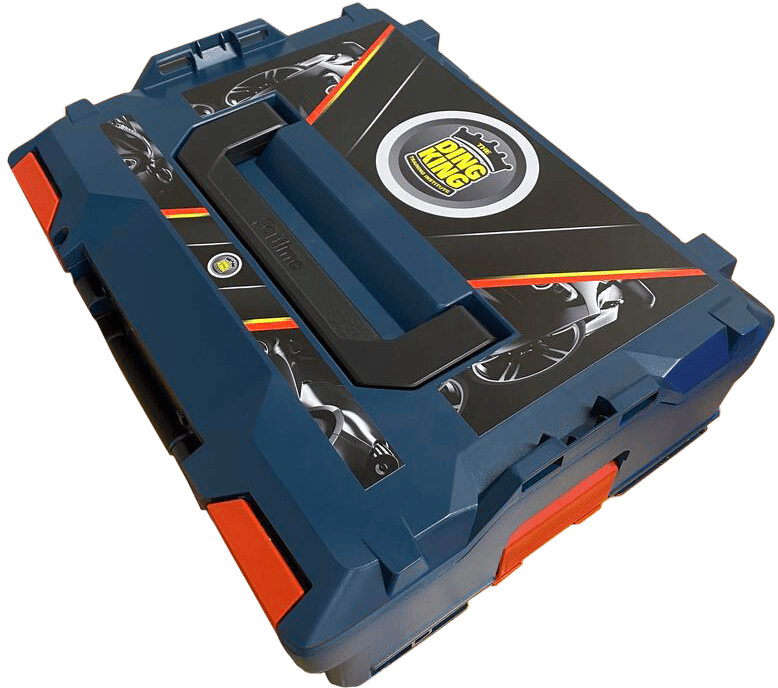
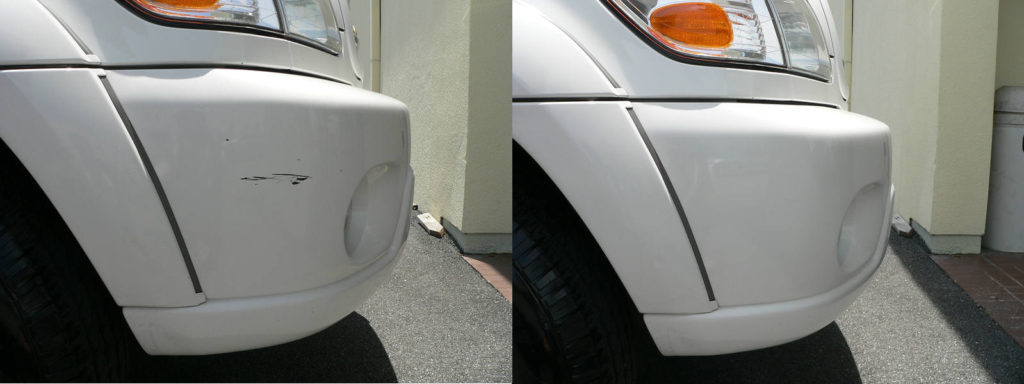
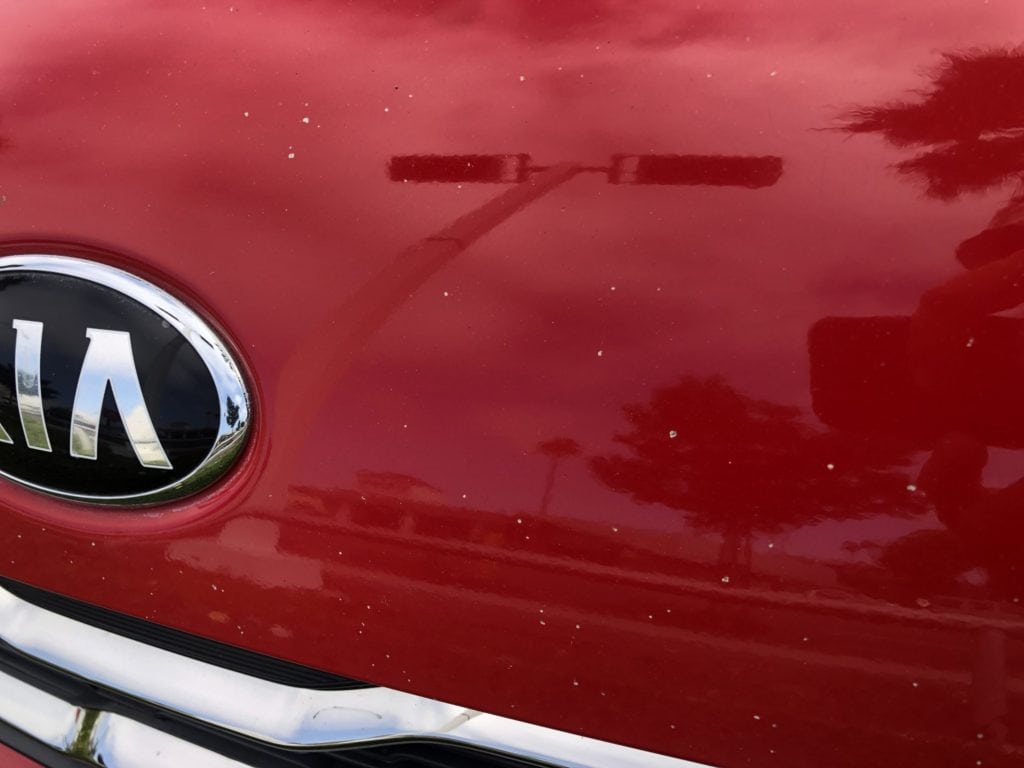
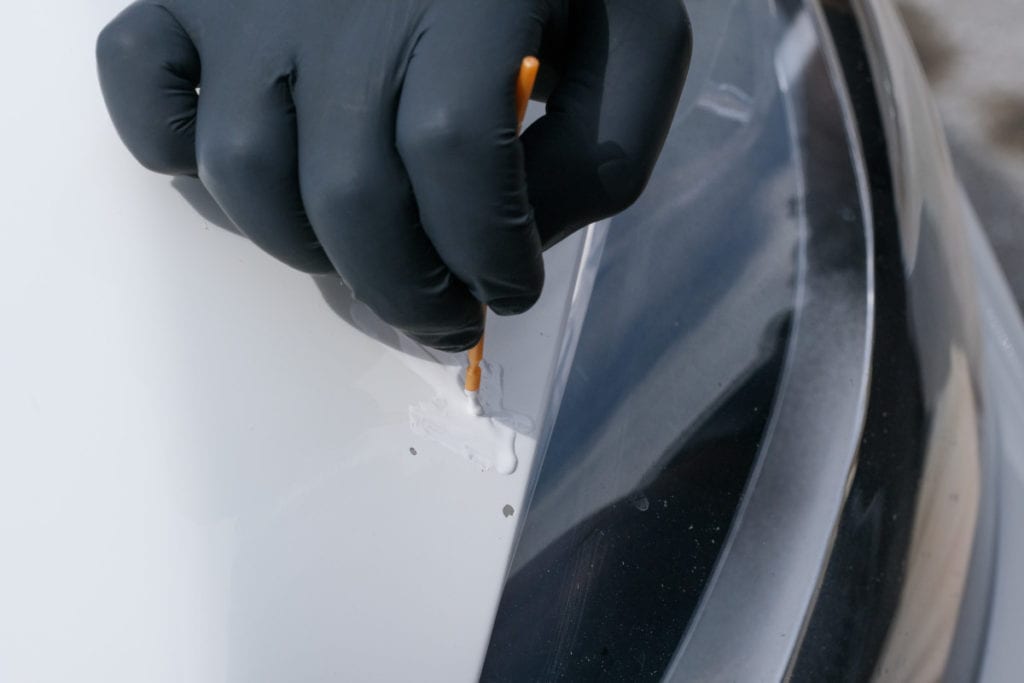
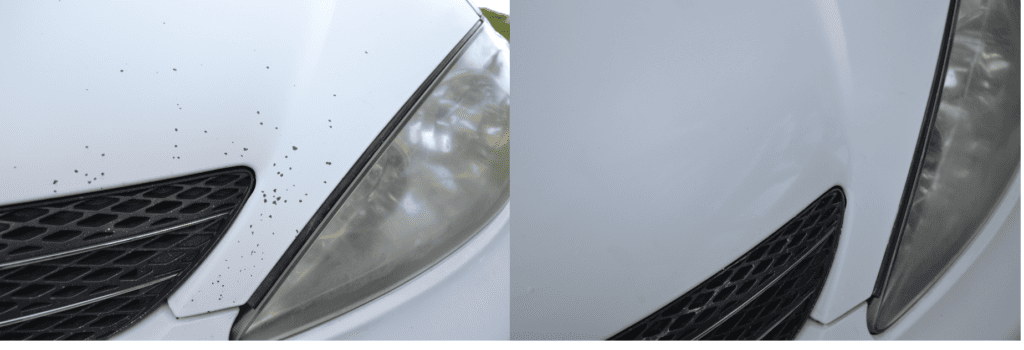
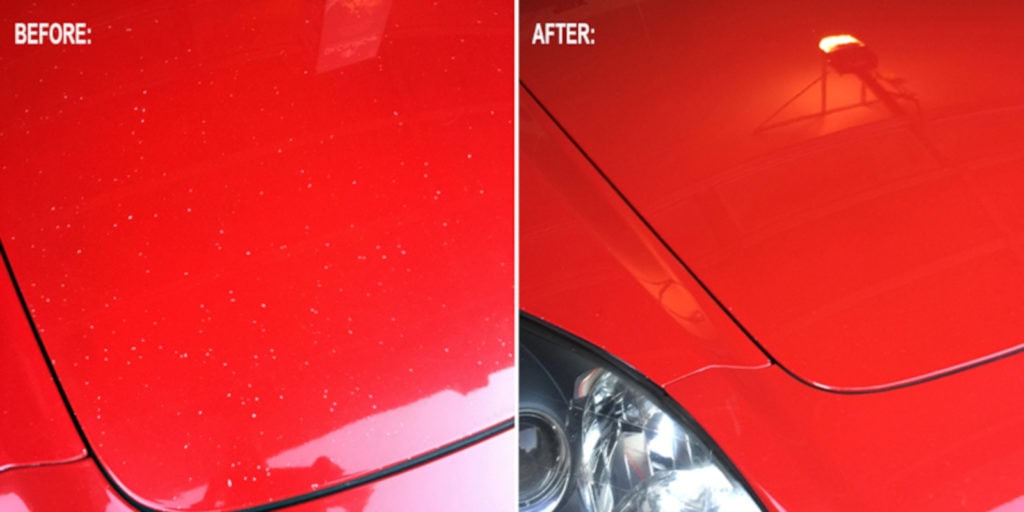
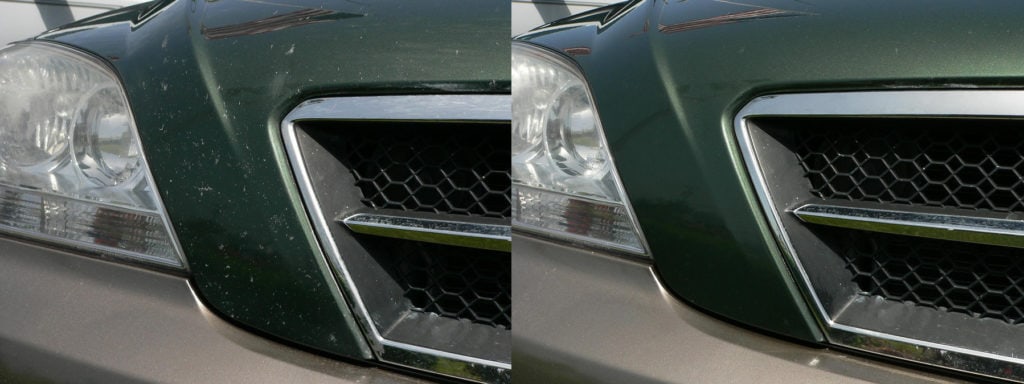
Stone chips, deep scratches, and road rash can ruin the appearance of your vehicle. Luckily, The Ding King’s Paint Touch Up Repair System make it easy to repair car paint damage and achieve permanent, professional repairs without going to a paint and body shop.
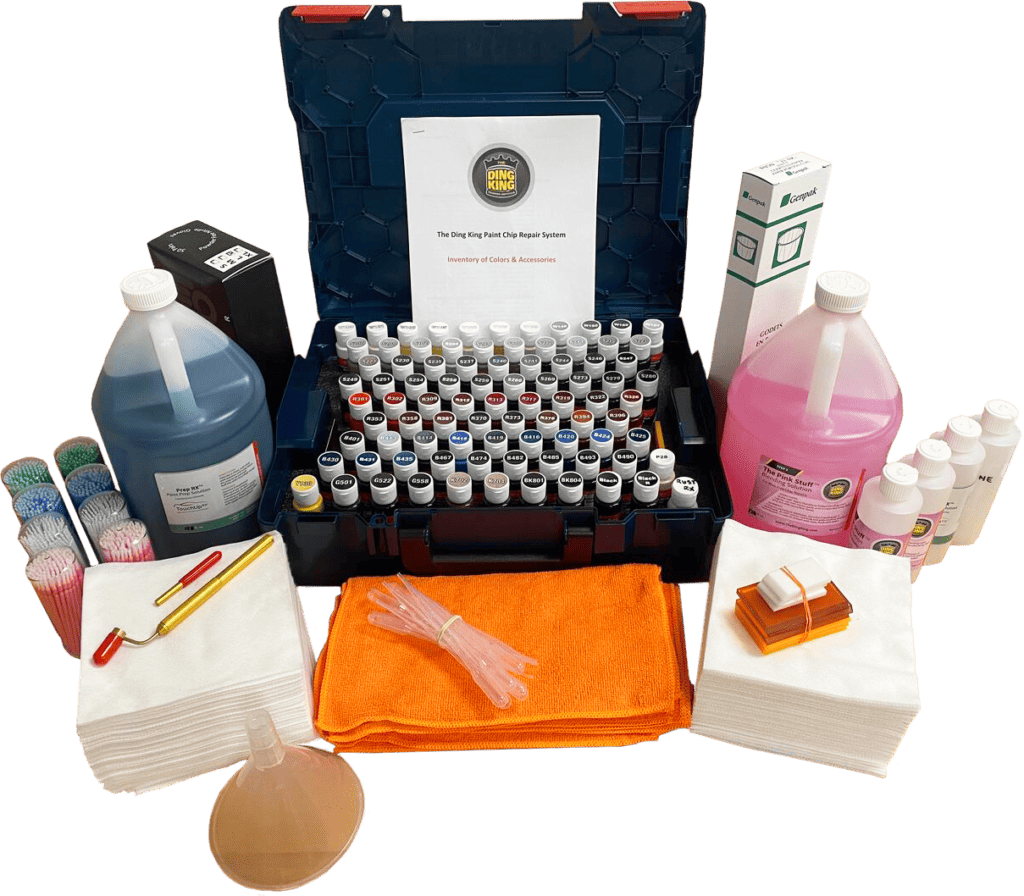
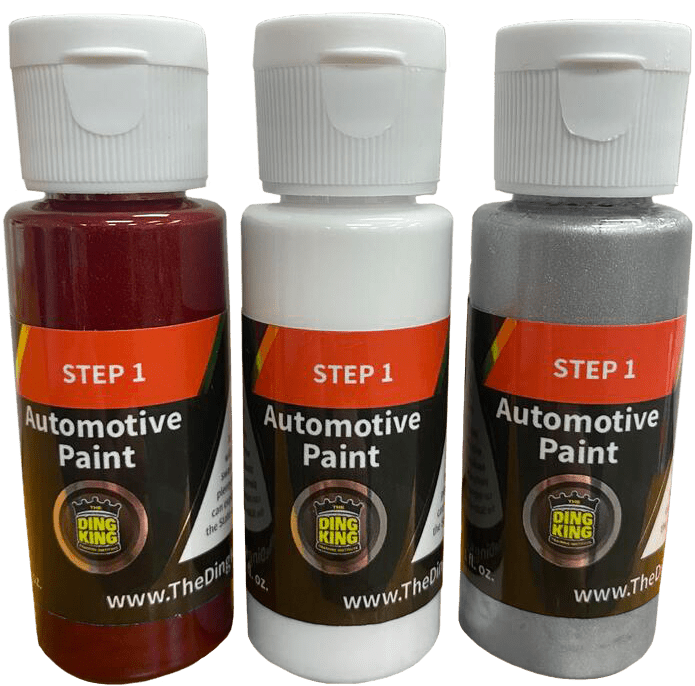
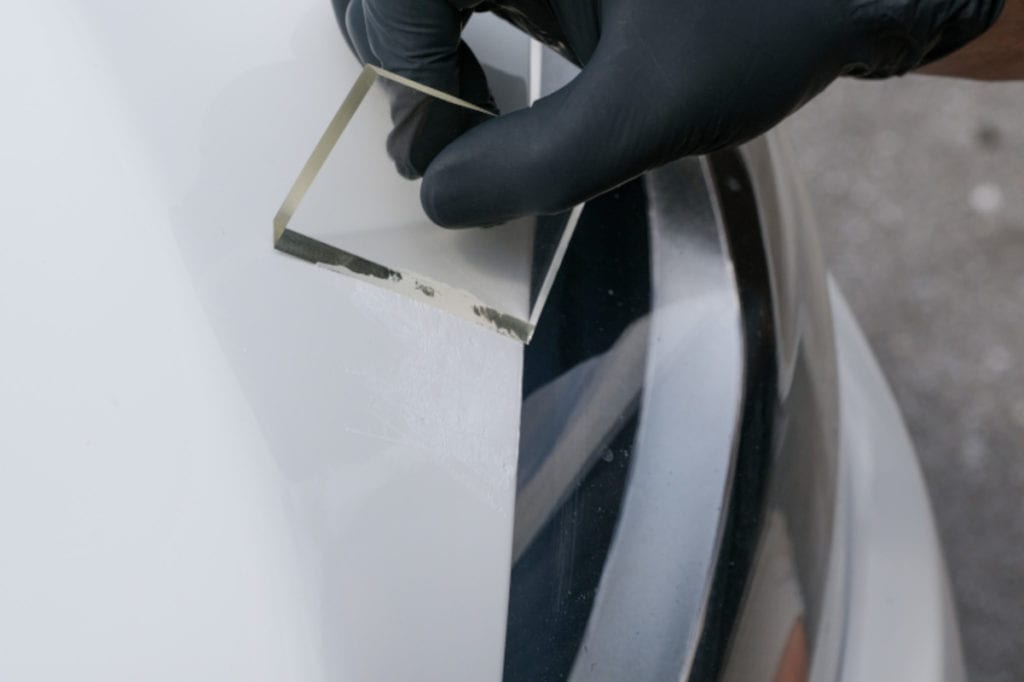
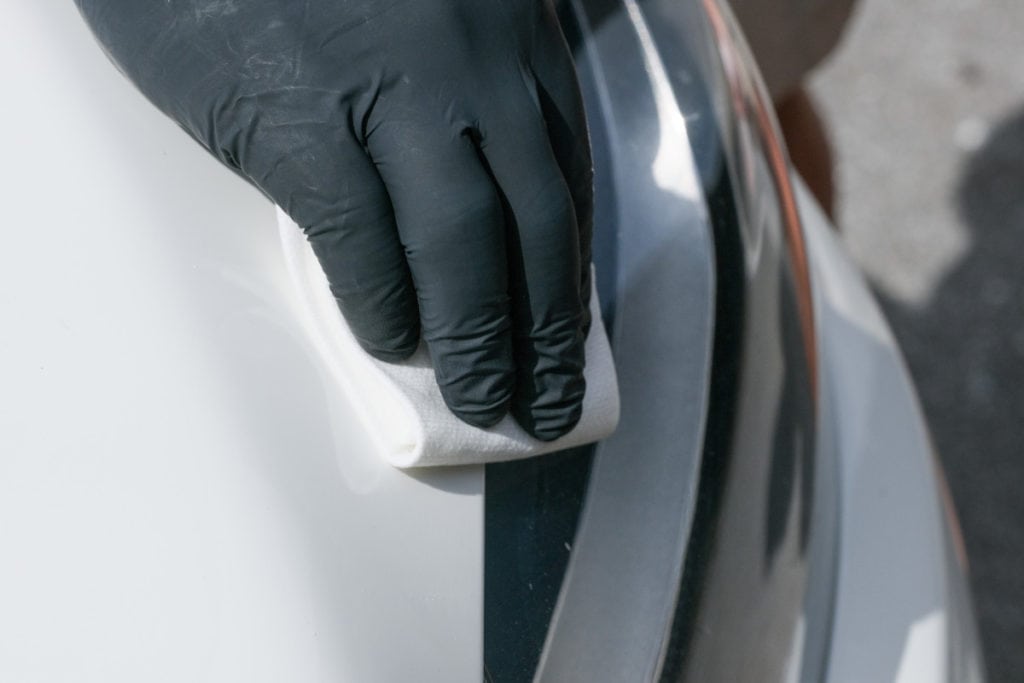
This system allows you to touch-up and repair paint chips and scratches using a very simple method to learn. It includes all the chemicals and paints necessary for you to repair a variety of damage as well as our proprietary wipe-on, wipe-off chemical package for “blob-free” finishes.
In today’s environment, the best competitive edge is to provide the highest quality repairs. Equip yourself with the newest technology such as our Ding King Chip Repair System and deliver unparalleled quality.
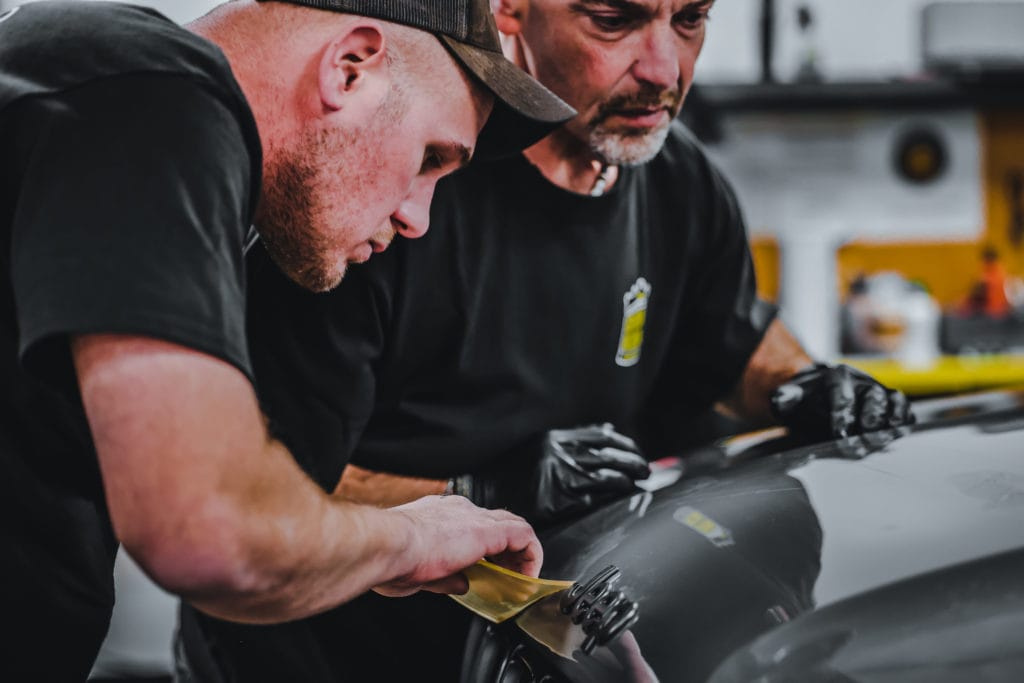
You’ll receive professional instruction by our Paint Touch Up by a Certified Master Instructor. They will teach you how to select the proper color for a perfect match along with repairing damage permanently, saving you time and creating higher profits for your business.
OUR PAINT CHIP KIT IS EASY TO USE
This process is so easy, you’ll probably just want to have your kids do it for you while you kick back with a cool drink and watch. But let’s make sure you have the process down before turning over the brush to Junior. Start with just a few chips and complete the process so you can make adjustments as needed before embarking on the whole vehicle.
NO MORE BLOBBY UNPROFESSIONAL PAINT TOUCH UP
The Ding King’s paint touch up kit provides smooth and even results that match the surface of the paint.
Our system will provide professional results in a faster time frame. Our repair process is simple to follow and our paint is easy to work with.
PREPARING YOUR SURFACE
You’ll want to be sure the vehicle is clean and dry. Generally, that’s enough to properly prep the surface. However, we do include a product that will remove any wax or silicone that may still adhere. It’s good to rid the area of such contaminants, as they may prevent proper paint adhesion. Make sure the panels to be repaired aren’t excessively hot. Ambient temperatures should be 40-95 degrees F.
STEP 1 - APPLY THE PAINT
Shake paint bottle until color is thoroughly mixed.
Please note, some colors look very different in the bottle or when initially dispensed than they do after smeared flat into the chip, so continue with the process even if the color looks a little off. You can always remove it entirely if needed.
Apply a small amount of paint to the panel next to the chips, OR, you can apply a small amount of paint directly to the underside of the beveled edge of the squeegee.
Pull the paint squeegee at about a 45-degree angle spreading paint over the chip(s.) The paint should lay smooth and flat, with little excess paint accumulating outside the chip. The paint will stick to the squeegee, so you can literally “pick up the paint” and apply more to other chips. Reapply as needed.
Apply to Damaged Areas.
Note the angle of squeegee.
Smear paint over chips.
Let the paint dry for at least a few minutes prior to the next step. The paint should be dry to the touch. For larger or deeper chips, you should give it more time as the paint toward the bottom of the chip may still be wet.
STEP 2 - REMOVE EXCESS PAINT
Now it’s time to remove all that excess paint around the chips.
Shake The Pink Stuff blending solution and apply to the folded blending cloth or a soft T-shirt rag. You’ll want to moderately saturate an area roughly 2″ x 2″. Don’t drown the rag in solution.
Hold the cloth flat against the panel with several fingers (not just one, as you may dig the paint out) and lightly rub over the chip. Don’t press too hard; let the solution do most of the work. After doing this a few times, you’ll know how much harder you can press without removing the paint in the chips to expedite the process.
You will see the excess paint begin to melt away, while the paint remains where needed in the chips. When all the excess paint is gone, quickly hand-buff the area with the microfiber towel to remove any residual blending solution. If the solution dries to a haze that can’t be removed, apply more solution and buff to remove. The area should shine up nicely.
Apply Pink Stuff to blending cloth
Blend excess paint away
Buff with microfiber towel
Our Pre-Mixed Paint Toner Kit Is An Excellent Add-on Profit Center
Repair a paint chipped vehicle
professionally in less than 10 minutes.
Topics Taught
Selecting the Correct Paint
Various Application Techniques
Safety and Care of Kit
How To Achieve a Shiny Result